Table Of Contents
Introduction
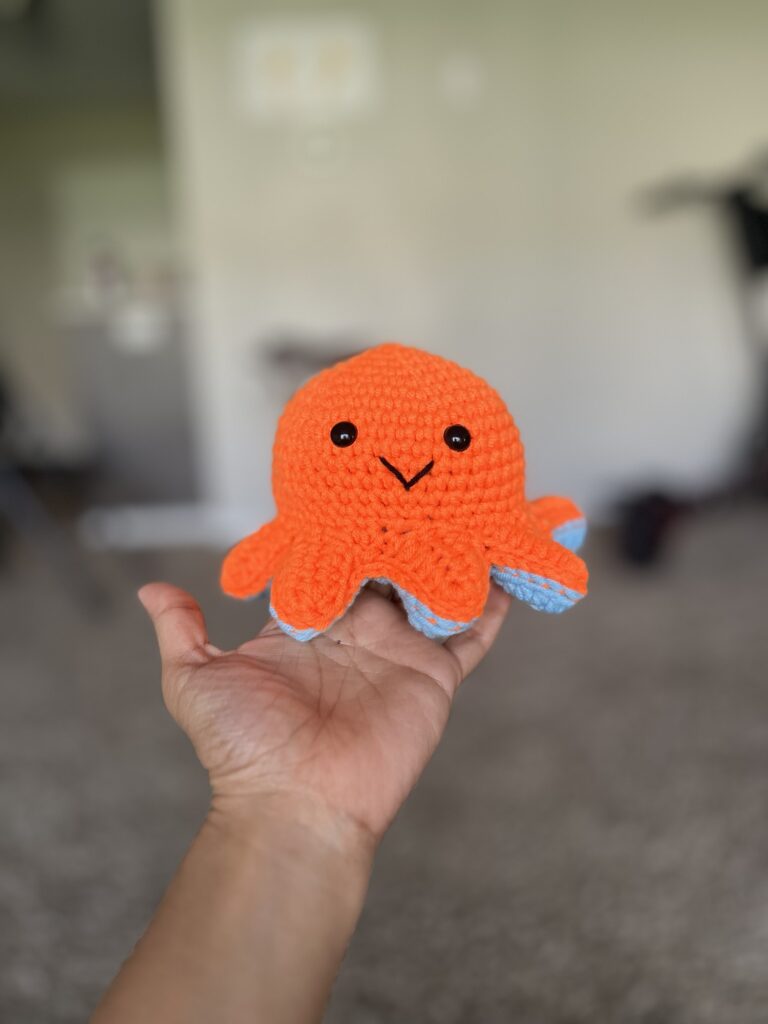
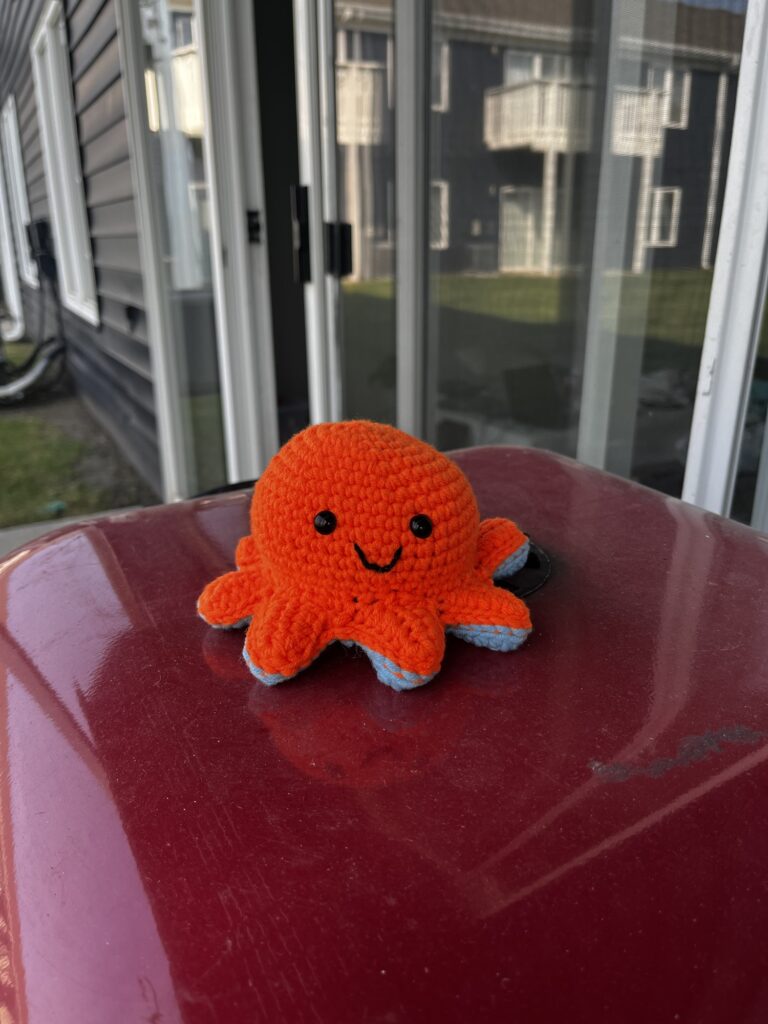
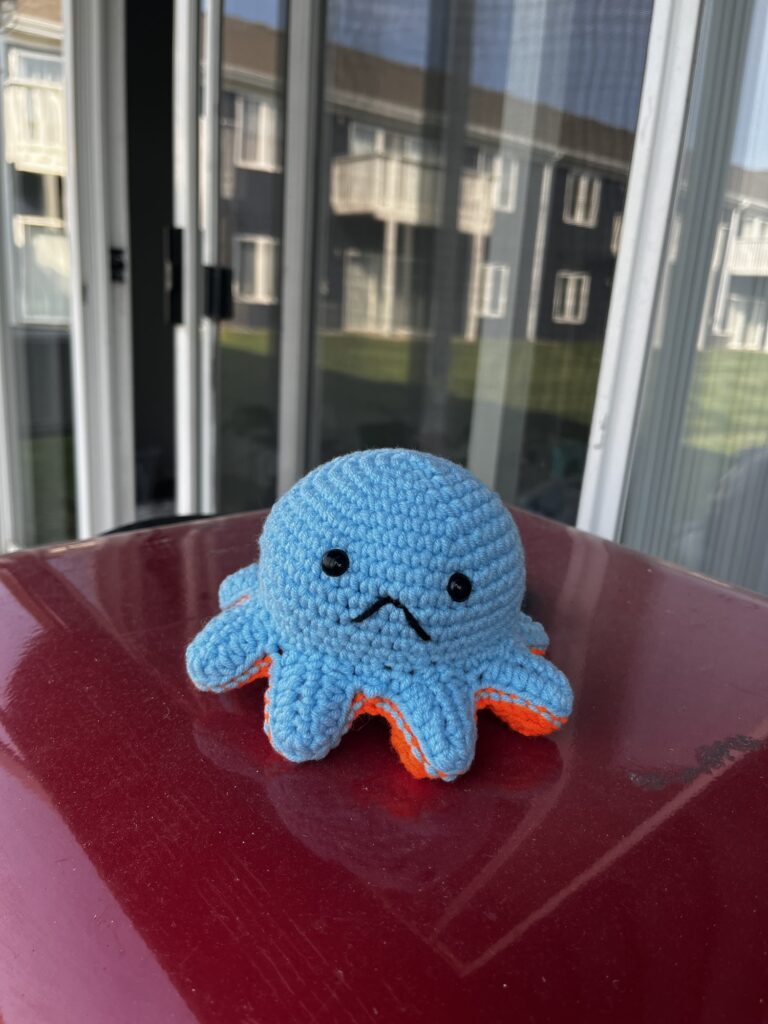
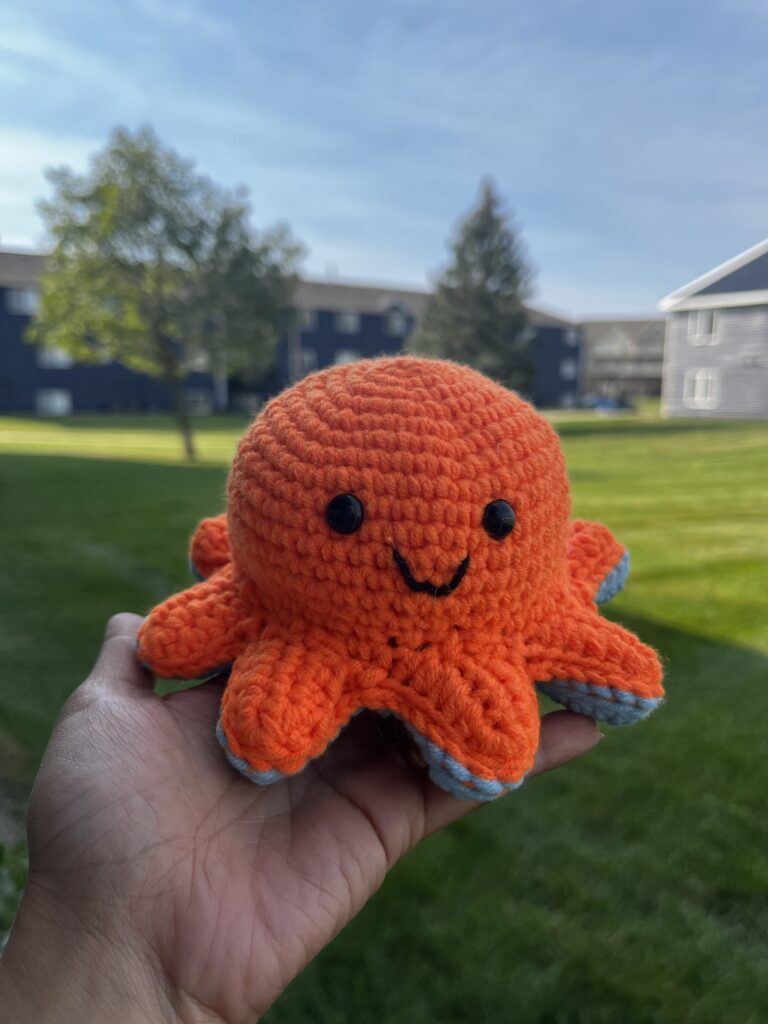
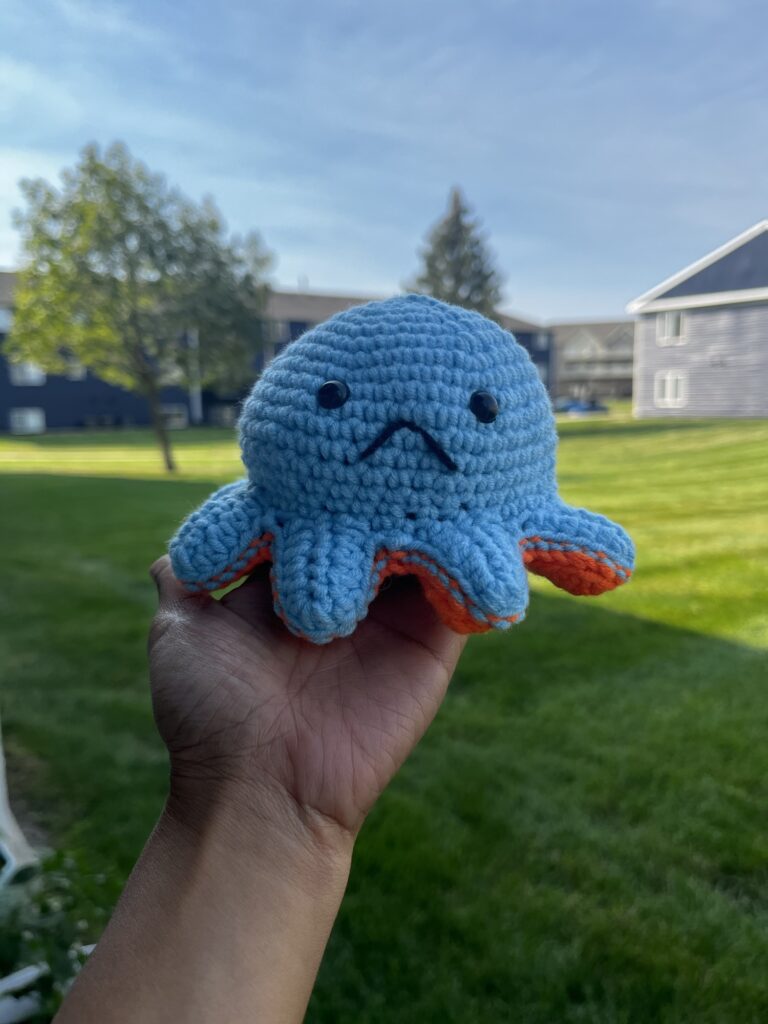
Crochet is such a rewarding and creative craft, and when it comes to making something both fun and functional, the reversible octopus mood toy is the perfect project! This adorable octopus toy not only looks cute but can also help express your mood—smiling on one side and frowning on the other. Whether you’re feeling happy or in need of a little space, this octopus is here to communicate for you. Plus, it makes a wonderful handmade gift for friends and family!
In this blog, I’ll guide you through all the steps to create your own reversible octopus. You’ll find the instructions for both sides, helpful tips for stuffing, and how to stitch them together to create that signature flip feature.
♥️♥️♥️♥️♥️♥️♥️♥️♥️♥️♥️♥️♥️♥️♥️
Isn’t this adorable? Crocheting a reversible octopus mood toy is a fun and satisfying project for both beginners and seasoned crocheters. Whether you’re making it for yourself, as a gift for a friend, or adding it to your crochet business, this handmade toy is both cute and expressive.
In this blog, I’ve provided the full written instructions for this easy and playful octopus pattern. However, you can also check out my YouTube channel for step-by-step video tutorials using the three links- link1, link2, link3 provided, to better understand the stitching techniques.

This reversible octopus mood crochet project is simple and beginner-friendly, making it perfect for anyone new to crochet. With its basic stitches, it’s easy to follow and enjoyable to work on. If you’re new to working in the round or creating amigurumi legs, it might feel a bit challenging at first, but don’t worry! With a little practice, you’ll master it quickly. It’s a great opportunity to create something playful while learning new techniques, offering a fun and satisfying result.
For step-by-step video tutorials, feel free to check out the three YouTube links provided!
Please subscribe to my channel for all the latest and the best patterns.
Since, Most of the crochet lovers just loved this pattern….. I think, you will also love it……
Therefore, just leave a comment in the comment section about it.
For getting updates of all my free patterns, please fill in the subscribe form
DECLARATION
Hi, I am Shabari Dutta. I work very hard on each and every pattern provided in this website, So you can always give a credit by mentioning my name & website www.hookedinloopsbyshabari.com in your posts.....♥️♥️♥️♥️♥️♥️♥️♥️♥️♥️♥️♥️♥️♥️♥️, h
You can sell any product made from this patternowever, you may not distribute this pattern as your own in any way!
Materials You Will Need To Crochet The Octopus:
- Two colors of yarn (one for each mood). Also black yarn for embroidering. i have used 3 DK Light worsted yarns.
- 3.5mm crochet hook
- Safety eyes (two pairs)
- Fiber fill
- Embroidery needle for facial features
- Stitch markers (optional)
- You may also like to read
Getting Started: Written Pattern to the Crochet Octopus
The Octopus Body
- Begin by creating a magic ring.
- Round 1: Work 6 single crochet (sc) stitches into the magic ring, and then pull the tail tightly to close the ring.
- Round 2: For this round, increase (inc) in each stitch, working 2 sc into every stitch, giving you a total of 12 stitches.
- Round 3: Alternate between 1 sc and an increase (1sc, inc) around the ring, ending with 18 stitches.
- Round 4: This time, work 2 sc in the first two stitches, then increase in the third stitch (1sc, 1sc, inc), repeating this pattern around for 24 stitches.
- Round 5: For this round, you’ll work 3 sc before increasing (1sc, 1sc, 1sc, inc), repeating the pattern around to make 30 stitches.
- Round 6: Next, alternate between 4 sc stitches and an increase (1sc, 1sc, 1sc, 1sc, inc) all the way around, increasing the stitch count to 36.
- Round 7: Continue by working 5 sc followed by an increase (1sc, 1sc, 1sc, 1sc, 1sc, inc), resulting in 42 stitches.
- Rounds 8–13: From here, you will simply work 1 sc in each stitch around for six rounds, keeping the stitch count at 42.
Now, it’s time to insert the safety eyes. Place them between rounds 10 and 11, making sure there are 7 stitches between them.
- Round 14: Begin decreasing by working 5 sc and then decreasing (1sc, 1sc, 1sc, 1sc, 1sc, dec), repeating this pattern all the way around for 36 stitches.
- Round 15: In this round, work 7 sc followed by a decrease (1sc, 1sc, 1sc, 1sc, 1sc, 1sc, 1sc, dec), leaving you with 32 stitches.
Making the Legs
- Round 16: Now, to make the legs, work 1 sc, then chain 6. Skip the first chain, then work 1 sc in the second chain from the hook, and 1 sc in each of the next 4 chains. Slip stitch (sl st) in the same stitch where you started the leg. Repeat this process (sc in next 4 sts, ch6, sc in the 2nd chain from the hook, sc in next 4 ch, sl st in the same st) for a total of 8 legs. Finish by working 3 more sc.
- Round 17: For this round, work 1 half double crochet (hdc) in the first sc stitch, then work 1 hdc in each of the next 4 chain loops along the side of the leg. In the next chain, work 3 hdc, followed by 1 hdc in the next 5 stitches along the opposite side of the leg. Skip 1 stitch, sl st in the next, and skip another stitch before continuing. Repeat this pattern (sk1, sl st, sk 1 st) for all 8 legs, leaving you with 136 stitches.
Now that the octopus body is complete, you’ll need to make a second piece following the exact same pattern. Embroider a smile on one piece and a sad face on the other.
Assembly
Once both pieces are ready, take the blue piece, turn it so the wrong side is facing out, and place it inside the pink one. Be sure to add just a thin layer of fiber fill for light fluffiness, taking care not to overstuff. Ensure that the blue and pink legs are aligned properly.
- Round 18: Finally, use slip stitches (sl st) to join the two pieces together. Insert your hook through the back loops of the pink stitches and the front loops of the blue stitches, ensuring each stitch is matched up with its corresponding partner. When you’ve completed about 70% of the round, start filling the legs lightly with fiber fill for added fluff. Once all the legs are filled, complete the round to close the octopus. Fasten off and weave in the loose ends securely.
Tips and Suggestions
- Choosing Yarn: Use soft, worsted-weight acrylic or cotton yarn for durability and shape retention in amigurumi projects.
- Avoid Overstuffing: Add just enough fiber fill to make the octopus fluffy but flexible for easy flipping between faces.
- Matching Legs: Ensure each leg aligns perfectly when joining the octopuses. Using a stitch marker helps keep track of your stitches.
- Safety Eyes: Attach safety eyes evenly and securely. For small children, embroider the eyes for extra safety.
- Customizing Faces: Experiment with different facial expressions, like a wink or neutral face, using embroidery floss for variety.
- Take Breaks: Amigurumi can be repetitive, so pause between rounds to avoid hand fatigue and keep the project enjoyable.
Conclusion
And just like that, you’ve made your very own reversible octopus mood toy! The best part? This toy isn’t just cute—it’s also functional! With one simple flip, you can express whether you’re feeling cheerful or need some alone time. Crocheting projects like this are wonderful because they bring out your creative side while also being useful.
I hope you enjoyed following along with this tutorial. If you try it out, I’d love to see your finished creations! Feel free to share your photos or ask any questions in the comments below. Happy crocheting!


| Subscribe … on Youtube | Follow … on Pinterest | Follow … on Instagram | |
