Table Of Contents
Introduction to this wonderful Crochet Blog
A crochet beanie is a versatile hat that can be customized in countless ways. Additionally, it can be made for all seasons by simply adjusting the yarn type and stitch pattern. Whether you prefer a slouchy or fitted style, ribbed or smooth texture, crocheted beanies are a wardrobe staple. In this comprehensive tutorial, we’ll walk you through everything you need to know to crochet the perfect beanie. From choosing the right yarn and hook till adding finishing touches, we’ll cover all the essential steps. So, let’s get started!
♥️♥️♥️♥️♥️♥️♥️♥️♥️♥️♥️♥️♥️♥️♥️
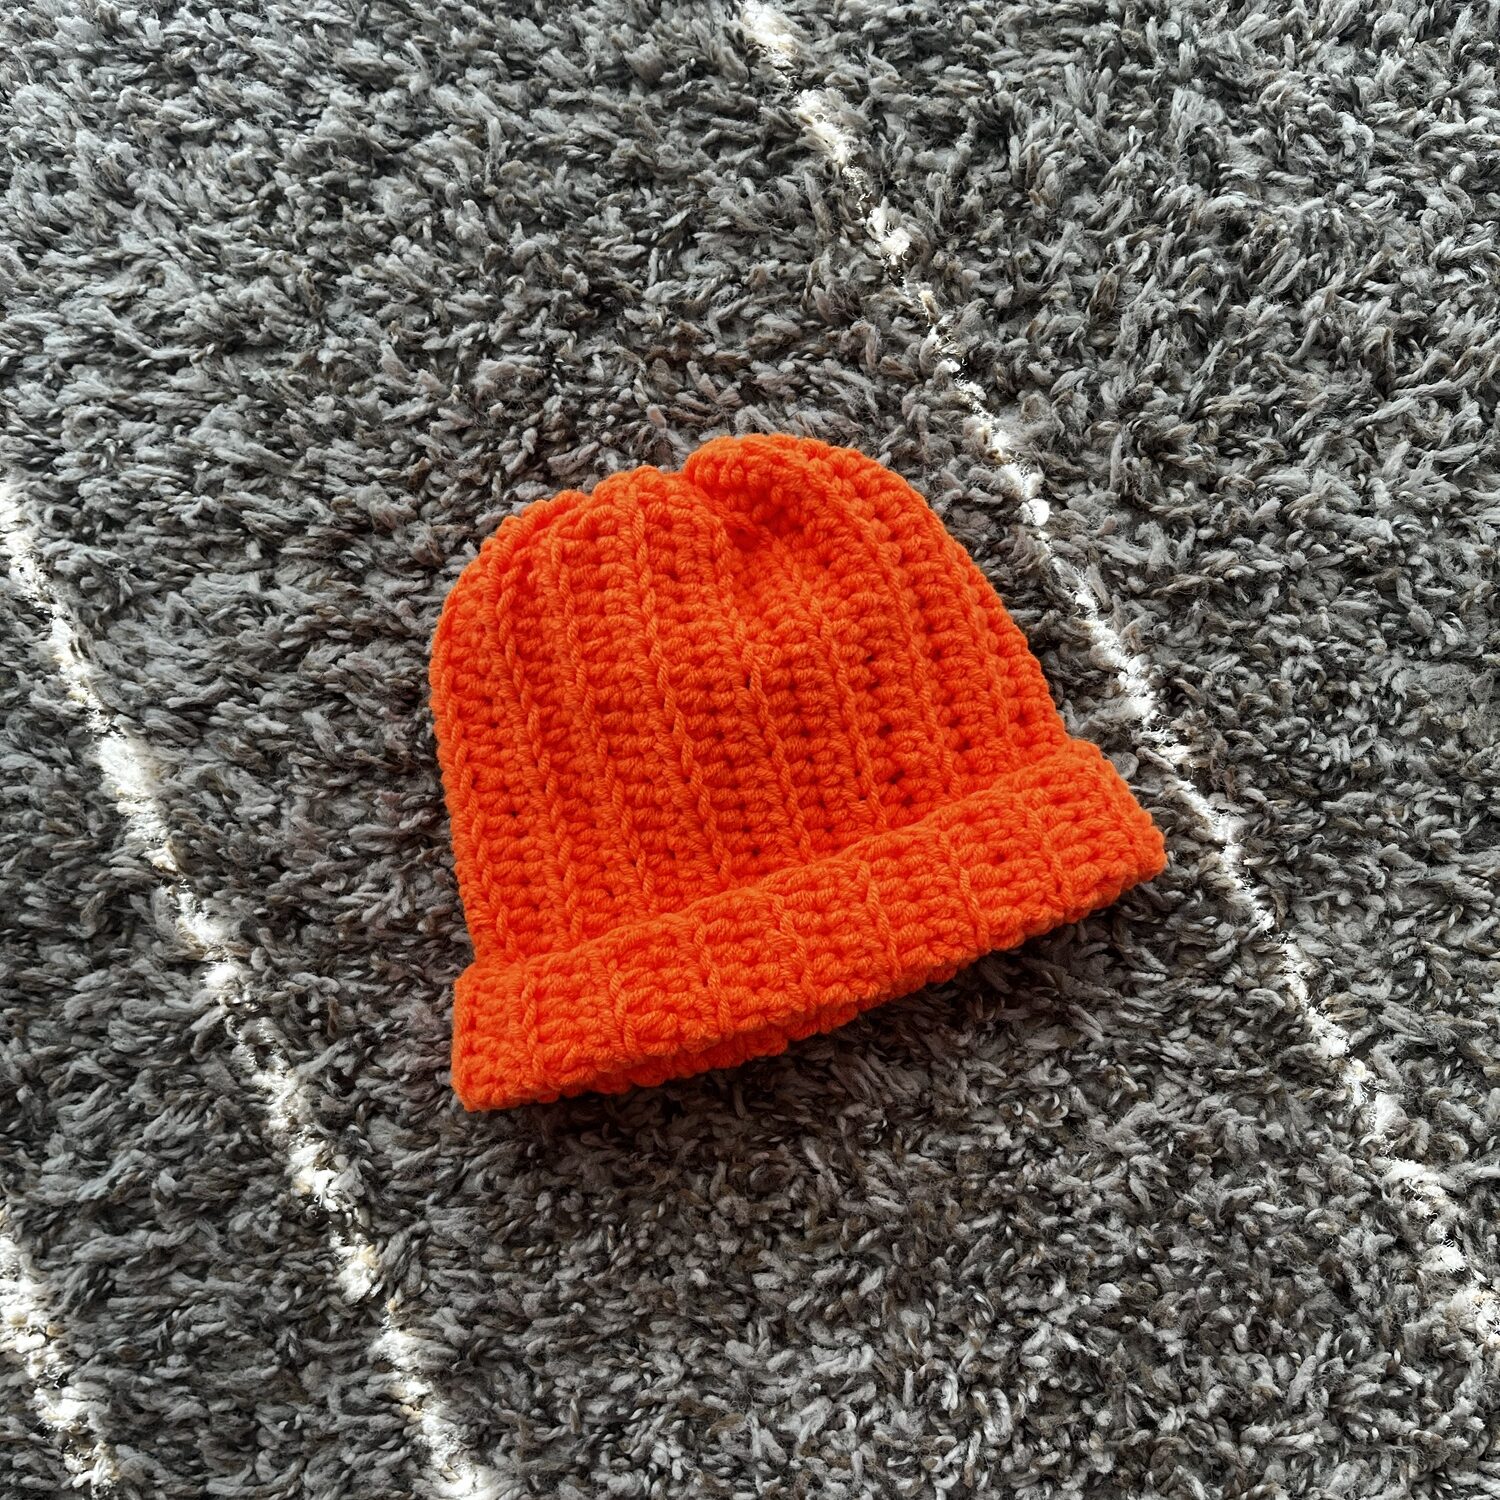
Isn’t this beautiful? Crocheting a beanie is a fun and rewarding project for both beginners and experienced crocheters alike. Whether you’re making one for yourself, gifting it to a loved one, or adding it to your crochet business collection, a handmade beanie is a cozy and stylish accessory.
I have given the written direction for this very cute and easy Crochet Beanie in this blog…However you can also visit my YouTube channel class link to understand the stitching technique better.
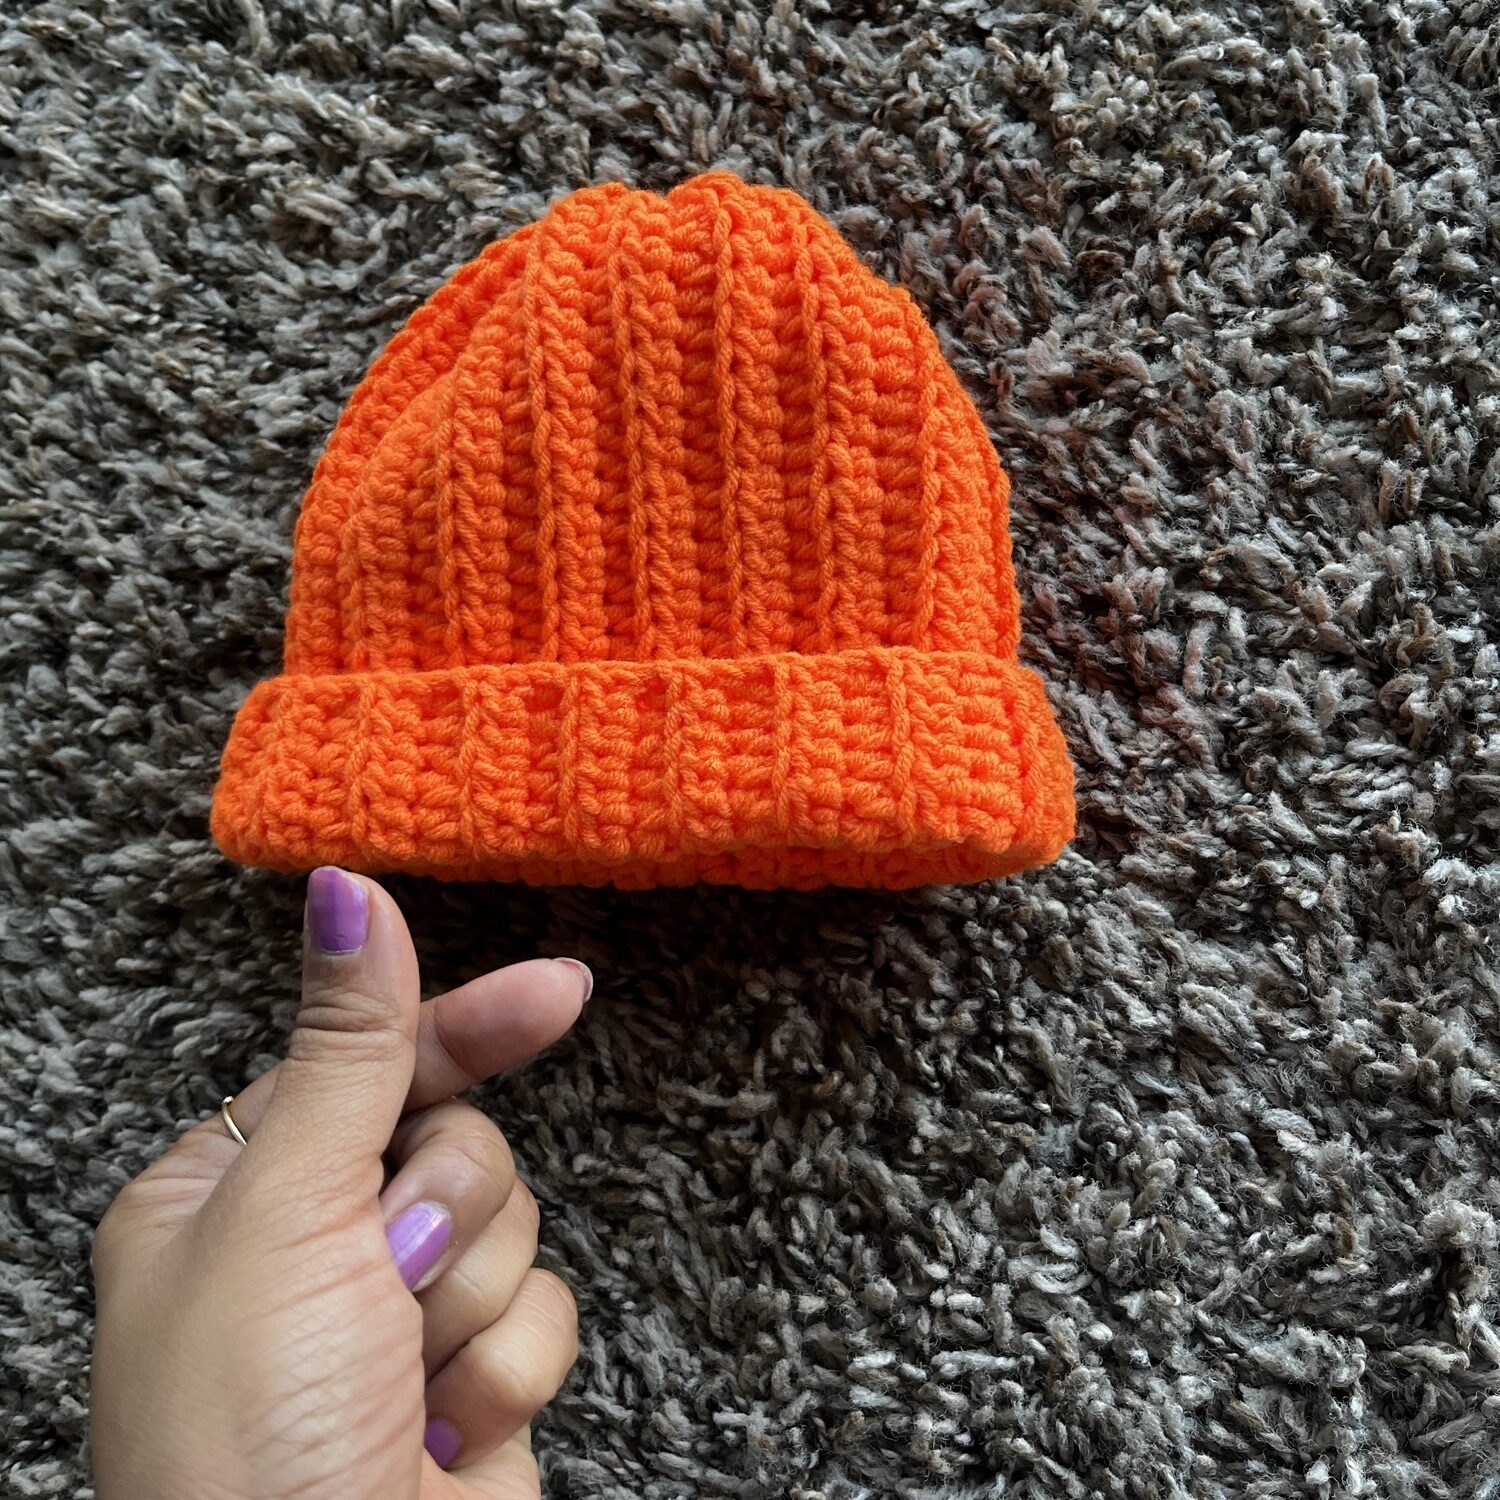
This crochet beanie project is simple and beginner-friendly, thus making it perfect for anyone new to crochet. With its basic stitches, it’s easy to follow and also enjoyable to work on. However, if you’re working in the round or doing decreases for the first time, it might seem a little tricky at first. But don’t worry! With some practice, you’ll quickly get the hang of it. It’s a great opportunity to create something stylish while learning new techniques, offering a fun and satisfying result in no time!
For the step-by-step video tutorial-
Please subscribe to my channel for all the latest and the best patterns.
Since, Most of the crochet lovers just loved this pattern….. I think, you will also love it……
Therefore, just leave a comment in the comment section about it.
For getting updates of all my free patterns, please fill in the subscribe form
DECLARATION
Hi, I am Shabari Dutta. I work very hard on each and every pattern provided in this website, So you can always give a credit by mentioning my name & website www.hookedinloopsbyshabari.com in your posts.....♥️♥️♥️♥️♥️♥️♥️♥️♥️♥️♥️♥️♥️♥️♥️, h
You can sell any product made from this patternowever, you may not distribute this pattern as your own in any way!
Materials Needed To Crochet a Beanie
Before you start, gather the essential materials for your beanie project. Here’s a quick list of what you’ll need:
- Yarn: The choice of yarn is crucial when crocheting a beanie. For colder months, choose thicker, bulkier yarns like wool or acrylic. For a lighter, breathable beanie, opt for cotton or bamboo yarn. However, I have used a DK weight yarn.
- Crochet Hook: The hook size depends on your yarn. Always check the yarn label for the recommended hook size. I have used a 3 mm hook. However choose according to the mentioned size.
- Stitch Markers: These are essential for marking the beginning of your rounds, especially if you’re working in continuous rounds.
- Tapestry Needle: You’ll need this to weave in the ends after your beanie is complete.
- Scissors: A pair of sharp scissors to cut your yarn neatly.
Beanie Construction
Beanies can be constructed in several ways. Below are the most common techniques:
- Top-Down Beanie: This method starts from the top of the hat and works down towards the brim. It involves crocheting in the round and gradually increasing until you reach the desired circumference.
- Bottom-Up Beanie: In this method, the beanie is started from the brim and worked upwards, usually in rows, until it’s time to shape the crown.
- Rectangular Beanie: For this simple method, you crochet a rectangle, then sew it into a tube and gather one end to form the crown.
In this blog, I have selected the 3rd technique, i.e, a Rectangular Beanie!! It is perfect for Beginners!!!
Sizing Your Beanie
Proper sizing is key to making sure your beanie fits comfortably and looks great. When crocheting a beanie, you’ll want to consider the circumference, height, and stretch of the fabric to ensure it fits the wearer properly. Here’s a detailed guide on how to size your beanie correctly, from measuring head sizes to understanding how crochet stitches stretch.
1. Measuring Head Circumference
The first step in sizing your beanie is to measure the head of the person who will be wearing it. To do this:
- Use a soft measuring tape.
- Measure around the largest part of the head, typically just above the ears and across the forehead.
- Write down this measurement—this is the head circumference.
2. Calculating Beanie Circumference
Crochet beanies are typically made smaller than the head circumference because crochet fabric stretches. The general rule is to make the beanie 1 to 2 inches (2.5 to 5 cm) smaller than the actual head size for a snug fit. This allows the beanie to stretch comfortably while still staying on the head.
3. Determining Beanie Height
The height of the beanie is measured from the crown (top) of the head to where you want the beanie to sit, typically near the bottom of the ears for a snug fit or just above the ears for a more relaxed or slouchy look.
Here is a comprehensive hat sizing guide. If you’re unable to obtain precise measurements for the individual, simply refer to the age group in the chart below. Use the recommended sizes for hat height and circumference corresponding to that age group to find the closest fit.
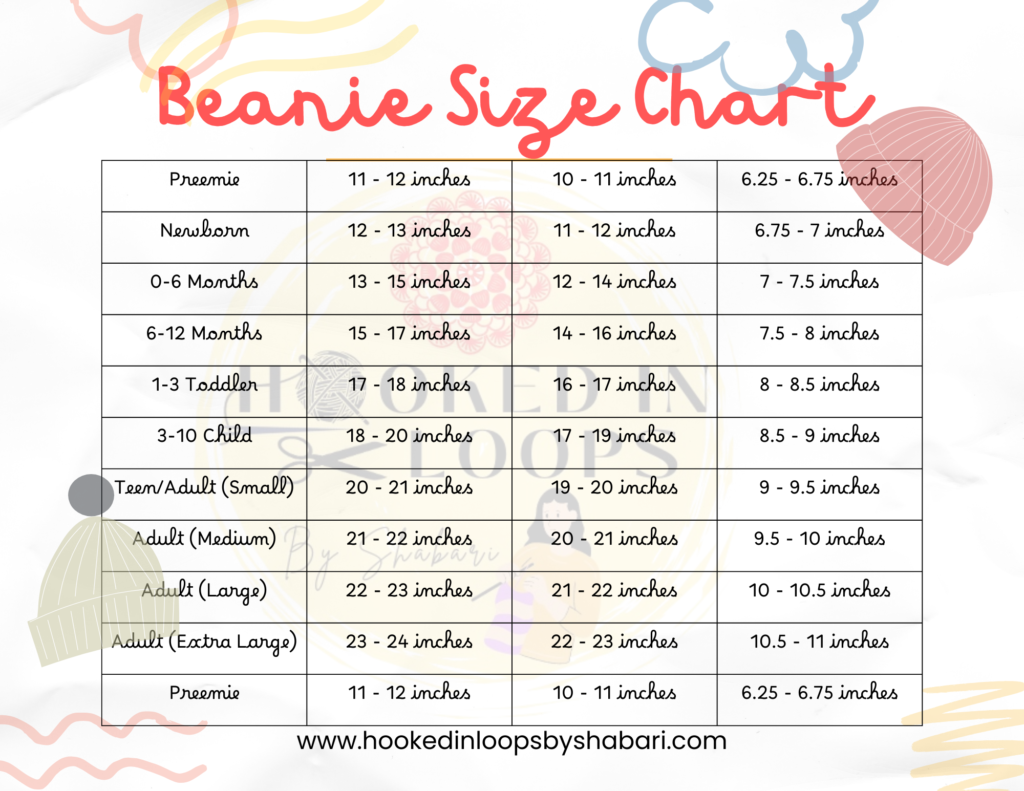
- This rule applies for most types of yarn, but some fibers (like cotton) have less stretch, so you might need to reduce the amount of negative ease (how much smaller the beanie is than the head).
- The height of the beanie will depend on whether you’re making a fitted or slouchy hat. If you want a more fitted beanie, stick with the recommended height. For a slouchy look, add 1 to 2 extra inches in height.
4. Understanding Beanie Shape and Stretch
The shape and structure of a beanie also play a role in sizing:
- Fitted Beanies: These beanies hug the head closely. They usually require accurate measurements of both circumference and height, with minimal extra room added.
- Slouchy Beanies: These have extra fabric at the crown, giving them a relaxed, draped look. When making a slouchy beanie, add extra height but keep the circumference snug so it doesn’t slide off the head.
- Brimmed Beanies: If your beanie includes a brim (often made using ribbed stitches like front and back post double crochets), be mindful that the brim should fit snugly around the head, as this is what helps keep the beanie in place.
Stretch: Different types of yarn and stitches will stretch to varying degrees. For instance:
- Acrylic yarn is stretchy and bounces back into shape, making it a great option for fitted beanies.
- Cotton yarn has less stretch and can lose shape over time, so it’s ideal for slouchy or relaxed-fit beanies.
- Wool yarn provides good warmth and natural elasticity, making it a good choice for snug-fitting winter beanies.
When choosing yarn, always crochet a gauge swatch first. A gauge swatch helps you determine if your stitches are the right size for the pattern and yarn you’re using. Adjust your hook size if your stitches are too tight or too loose to match the desired fit.
5. Tips for Adjusting Beanie Size
- Gauge Check: Always start with a gauge swatch to ensure your stitches match the pattern’s recommended size. This is especially important for fitted beanies where size is crucial.
- Try It On: If possible, try the beanie on as you crochet. This is especially helpful if you’re not following a pattern or if you’re adjusting one to fit a specific head size.
- Stretch Test: Crochet fabric tends to stretch over time, so keep this in mind, especially if you’re working with yarn that has a lot of elasticity. For fitted beanies, you want the initial fit to be snug, knowing it will loosen slightly after wear.
- Decreases and Crown Shaping: If you’re working a beanie top-down, proper shaping at the crown (by making evenly spaced decreases) is essential to get the right fit. If you’re unsure, try measuring the diameter of the top circle as you work—this will give you a good indication of how big the finished circumference will be. The formula for the diameter is:Diameter=Head Circumferenceπ\text{Diameter} = \frac{\text{Head Circumference}}{\pi}Diameter=πHead CircumferenceFor example, for a head circumference of 21 inches: Diameter=213.14=6.7 inches\text{Diameter} = \frac{21}{3.14} = 6.7 \text{ inches}Diameter=3.1421=6.7 inchesOnce your top circle measures around 6.7 inches, stop increasing and continue crocheting evenly to build the body of the beanie.
6. Common Sizing Adjustments
If your beanie doesn’t fit quite right, here are some quick adjustments you can make:
- Too Large: Use a smaller hook size to create tighter stitches. You can also make fewer rounds of increases or stop increasing sooner for top-down beanies.
- Too Small: Increase your hook size for looser stitches, or add extra rounds to increase the beanie’s height or circumference.
Pattern For The Crochet
My Beanie is for a NEW BORN kid! Hat circumference is around 12 inches and height is around 6.75 inches.
- Foundation Chain: Firstly, make a foundation chain of 32 chains, measuring approximately 6.75 inches. Ensure it aligns with the desired hat height.
- Row 1: Work a half double crochet (hdc) in the second chain from the hook. Then do Hdc in each chain across for a total of 31 stitches. Finally chain 1 and turn.
- Row 2: Hdc in each stitch across, crocheting in the back loops until the last stitch. For the final stitch, hdc through both loops. Total stitches remain 31. Then chain 1 and turn.
- Rows 3 – 36: Repeat the Row 2 pattern (I completed up to Row 36 for a circumference of approximately 12 inches for newborns. However, you can adjust rows as needed for your specific measurements).
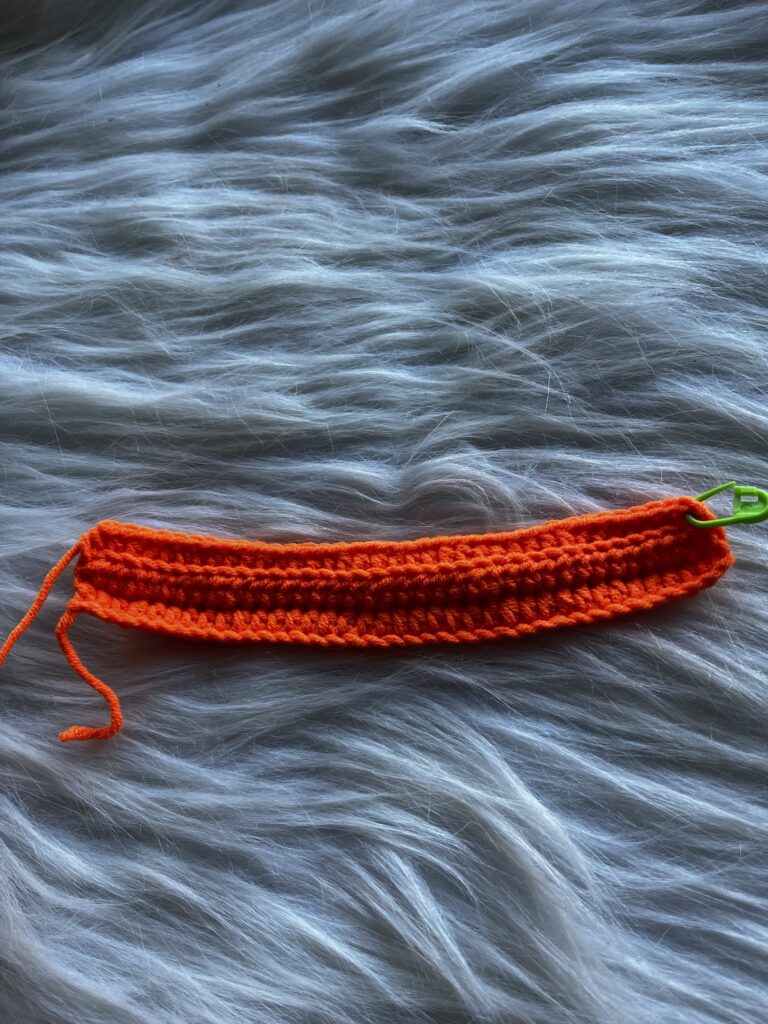
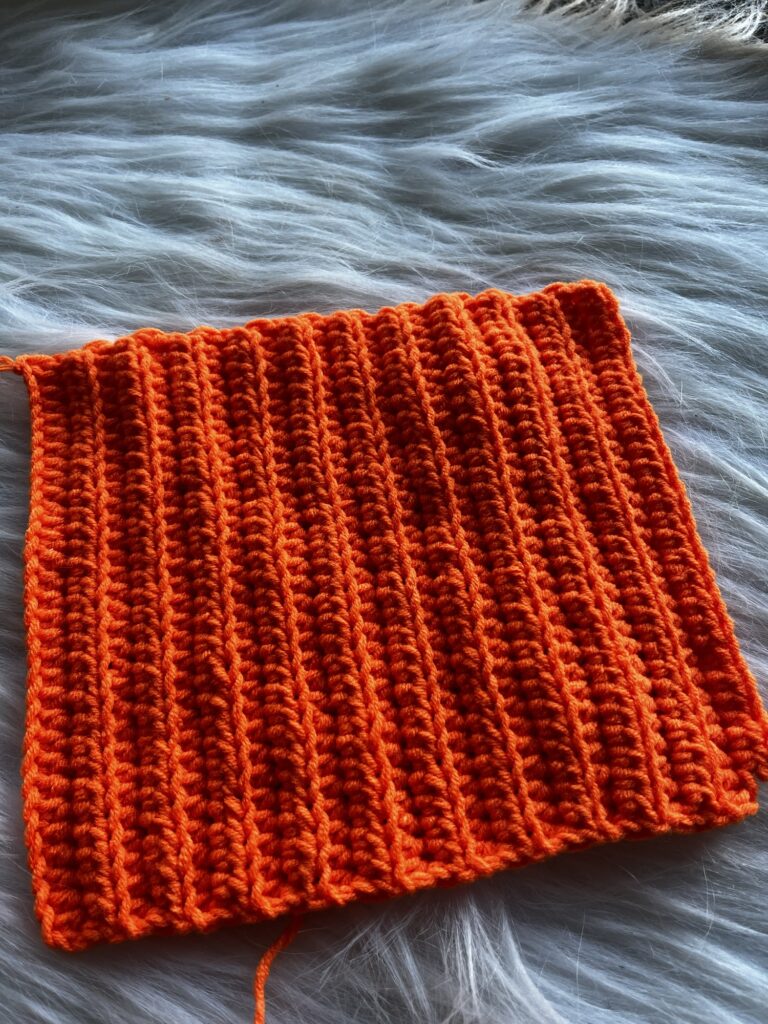
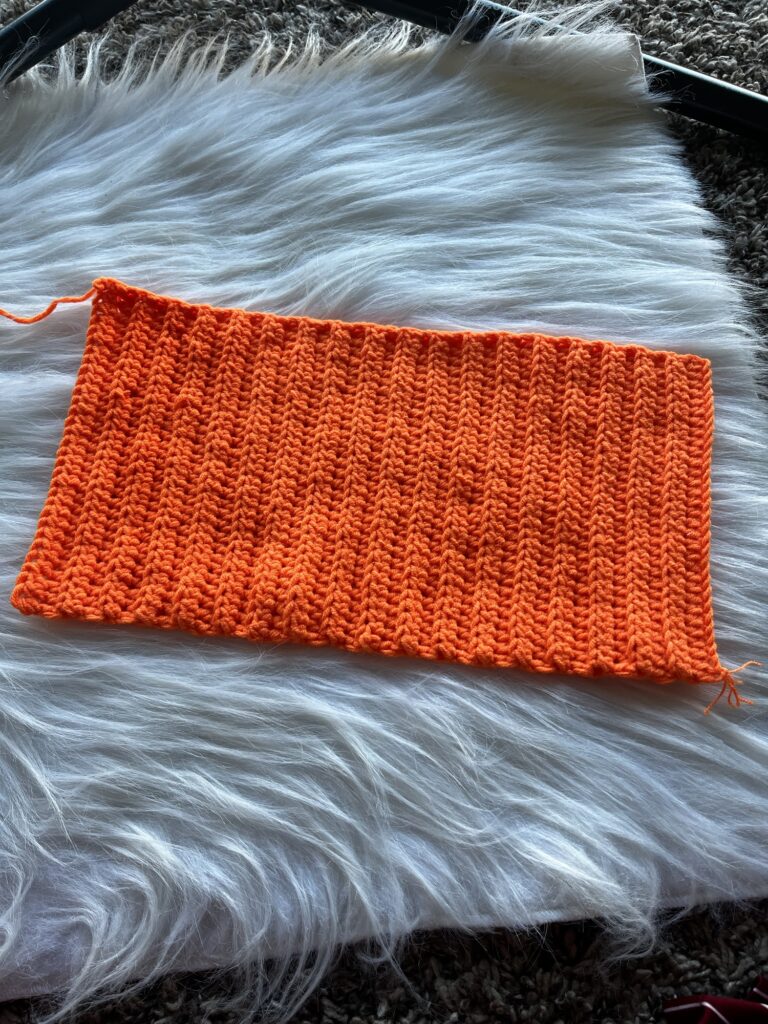
- After the last ch1,
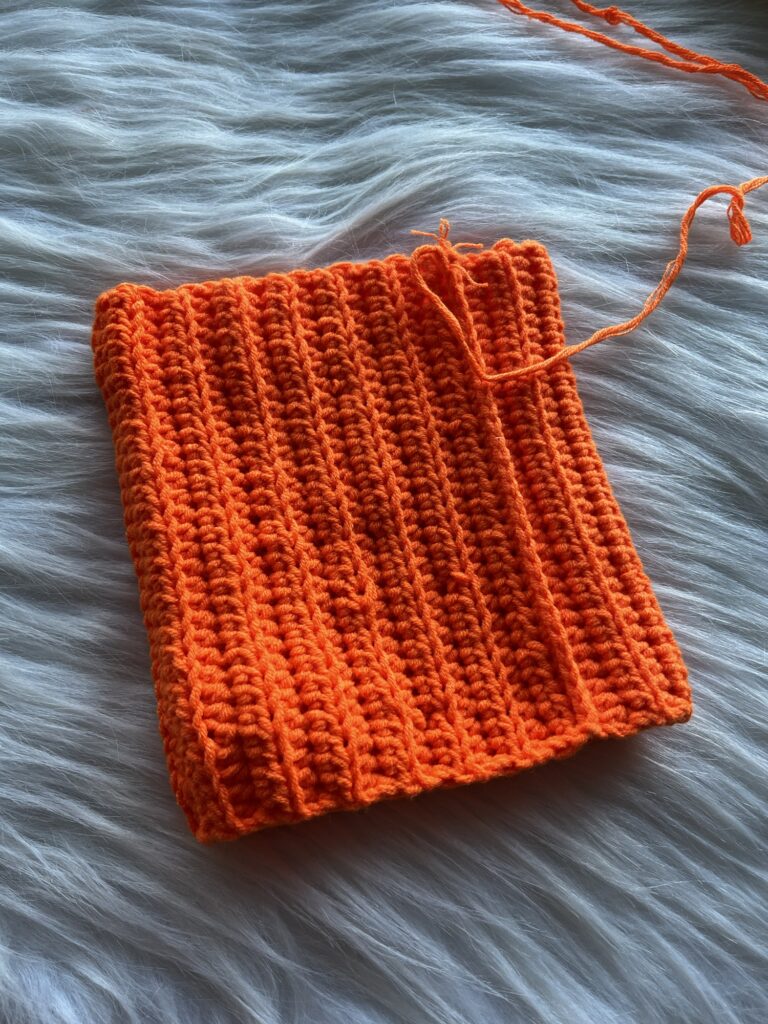
Fold your beanie in half, ensuring that the first and last rows are aligned. Then, join the opposite stitches using single crochet (sc) stitches. Afterward, chain 1 and cut the yarn to secure your work. Make sure to keep a long tail for sewing the top portion.
- Then, take your yarn needle and weave the tail in and out of the stitches around the top of your beanie. Pull the end tight to cinch it closed. After that, sew the top shut and tie it off securely. Finally, weave in any loose yarn ends. Once that’s done, turn your beanie right side out, fold the bottom flap up, and you’re all set! ♡
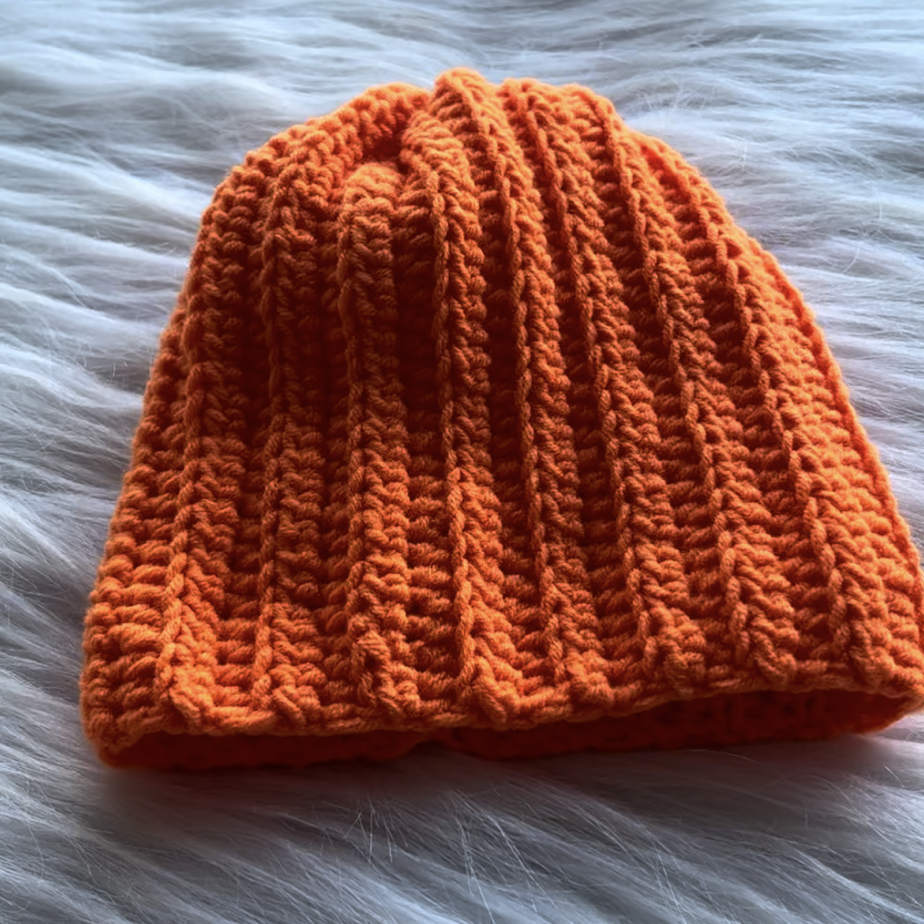
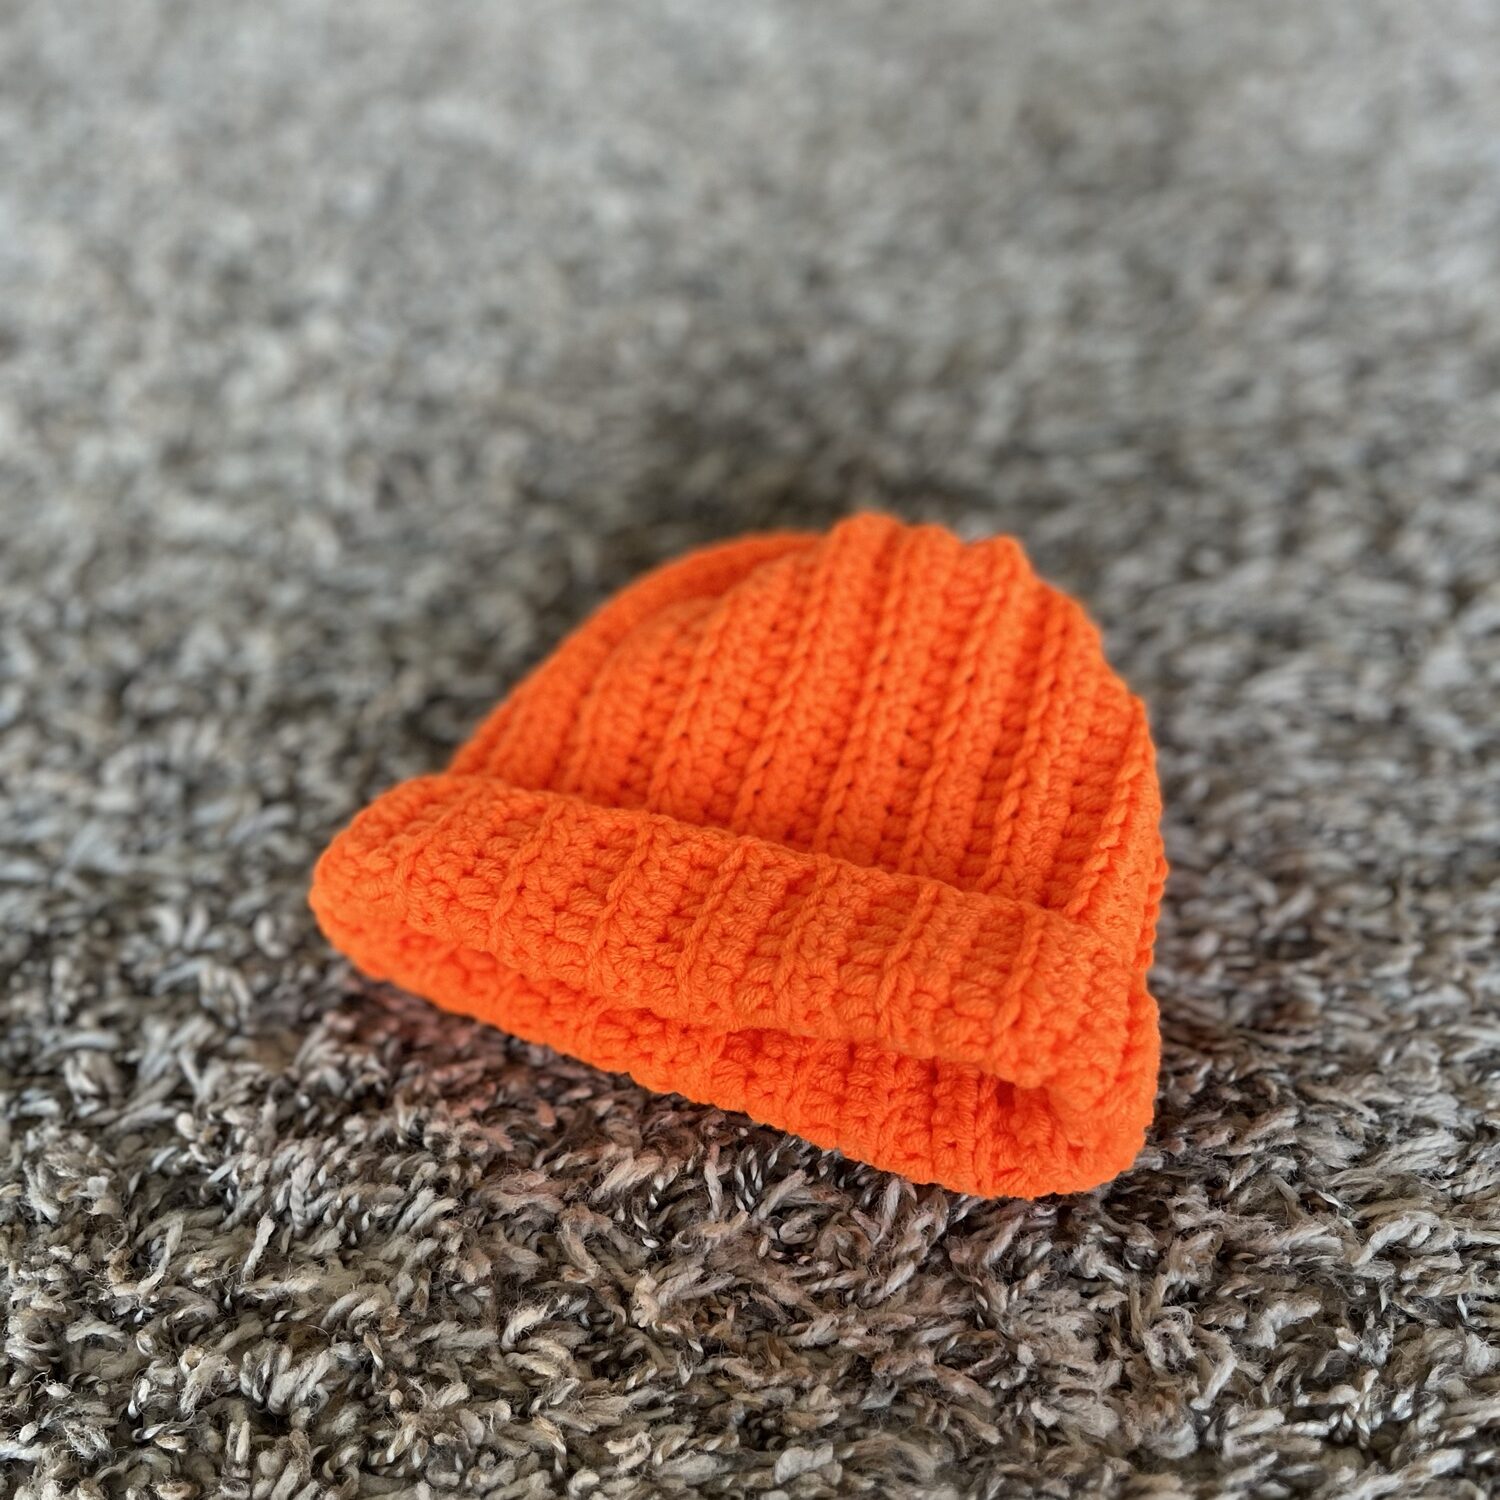
Voila!!! The cute Beanie is ready !!!!
Tips and Suggestions for Crocheting a Beanie
- Choose the Right Yarn: Opt for a soft, stretchy yarn that will provide warmth and comfort. Acrylic blends or cotton yarns work well for beanies.
- Check Your Gauge: Before starting, make a gauge swatch to ensure your stitches match the recommended size. This will help you achieve the desired fit.
- Use Stitch Markers: Place stitch markers at the beginning of each row in order to keep track of your progress and avoid losing count.
- Practice Color Changes: If you plan to incorporate multiple colors, practice the color-changing technique on a swatch in order to ensure smooth transitions.
- Experiment with Stitches: Don’t hesitate to try different stitch patterns for texture, such as ribbing or shells, to make your beanie unique.
- Adjust for Fit: If the beanie feels too tight or too loose, adjust the number of rows or stitches accordingly. Trying it on frequently can help you achieve the perfect fit.
- Finishing Touches: Consider adding embellishments like pom-poms or flowers in order to personalize your beanie and give it a special touch.
- Block Your Beanie: After finishing, lightly steam or block your beanie to help it hold its shape and thus enhance the final appearance.
- Keep it Simple: If you’re a beginner, start with basic stitches and then gradually work your way up to more complex patterns as you gain confidence.
- Have Fun: Most importantly, enjoy the process! Crocheting should be a relaxing and enjoyable experience, so take your time and savor each stitch.
Conclusion
Sizing your crochet beanie properly is essential for both comfort and appearance. By carefully measuring head circumference and adjusting for yarn stretch, you can create a beanie that fits perfectly. Keep in mind that different styles and yarns will affect the fit, so it’s always good to try your project on as you go. Whether you’re making a snug winter hat or a casual slouchy beanie, taking time to focus on sizing will result in a more polished and enjoyable crochet project.


| Subscribe … on Youtube | Follow … on Pinterest | Follow … on Instagram | |
