Table Of Contents
Introduction
Are you looking for a simple yet elegant crochet project? Look no further! Crocheting a bow is an incredibly easy and hence a rewarding project for beginners and seasoned crocheters alike. Whether you’re embellishing a hat, adding flair to a gift, or just want a quick and fun project, this step-by-step pattern will guide you through making your very own crochet bow. Thus with just a few basic stitches and some creativity, you’ll have a beautiful handmade bow in no time!

♥️♥️♥️♥️♥️♥️♥️♥️♥️♥️♥️♥️♥️♥️♥️
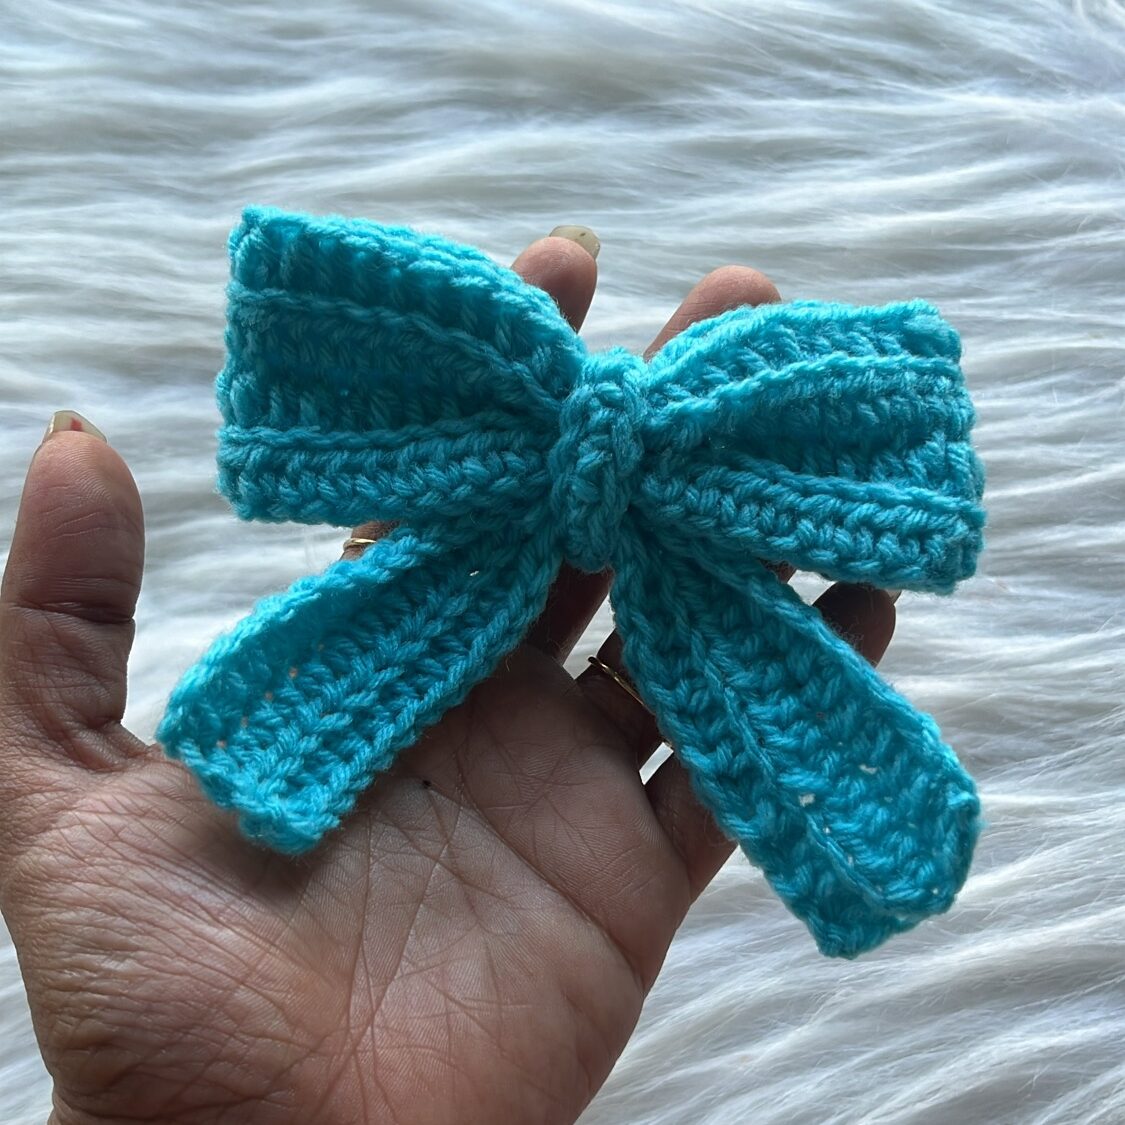
Isn’t this beautiful? You can make this bow and then gift this to your dear ones. … Handmade gifts are just perfect !!!!
I have given the written direction for this very cute and easy BOW in this blog. However you can also visit my YouTube channel link to understand the stitching technique better.
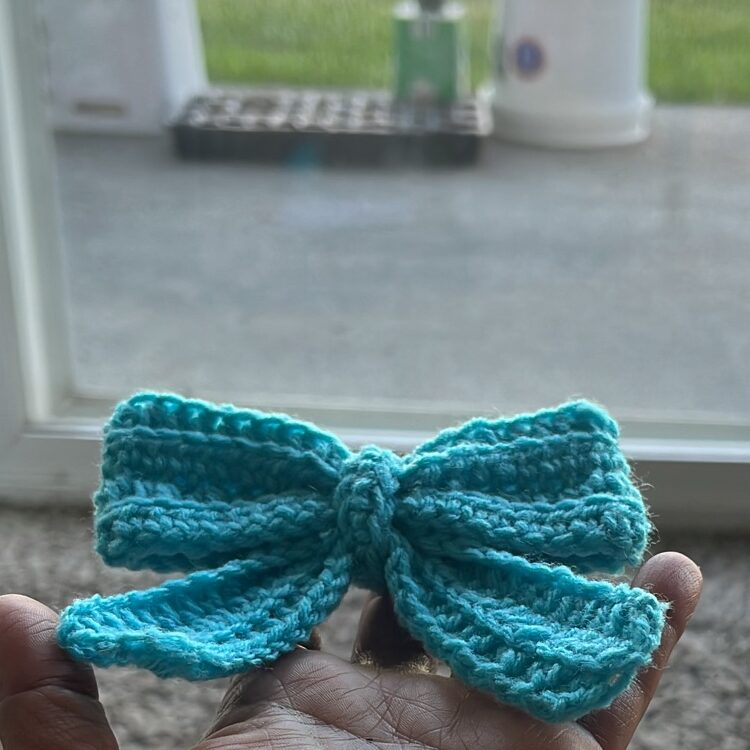
This project is really fast and easy and hence a perfect practice project for beginners.
For the step-by-step video tutorial-
Please subscribe to my channel for all the latest and the best patterns.
Since, Most of the crochet lovers just loved this pattern….. I think, you will also love it……
Therefore, just leave a comment in the comment section about it.
For getting updates of all my free patterns, please fill in the subscribe form
DECLARATION
Hi, I am Shabari Dutta. I work very hard on each and every pattern provided in this website, So you can always give a credit by mentioning my name & website www.hookedinloopsbyshabari.com in your posts.....♥️♥️♥️♥️♥️♥️♥️♥️♥️♥️♥️♥️♥️♥️♥️, h
You can sell any product made from this patternowever, you may not distribute this pattern as your own in any way!
Getting Started
Before we dive into the pattern, it’s important to gather your materials. One of the great things about crocheting bows is that you can use leftover yarn from other projects, thus making this a fantastic stash buster. The key to making the perfect bow is to choose yarn that has a good structure—too soft, and the bow might not hold its shape well, while too stiff can make it difficult to crochet.
Another tip is to ensure you’re comfortable with half double crochet (hdc) and single crochet (sc) stitches since these are the building blocks of this pattern. Don’t worry if you’re a beginner—this is just the perfect opportunity to practice!
Materials Needed
- Acrylic Yarn (4 ply )
- 3 mm crochet hook
- Tapestry needle for weaving ends
- Scissors
Abbreviations
- ch- chain
- hdc- half double crochet
- st- stitch
- blo- back loop only
- sc- single crochet
Written Pattern For The Crochet Bow

1 – Bow Portion
- Foundation Chain: Ch 41.
- Row 1: Starting from the 2nd ch from the hook, do 1 hdc in each ch across. (40 hdc). Then ch 1, turn.
- Row 2: Work 1 hdc in each st, blo. Finally ch 1, turn.
- Row 3: Repeat Row 2.
- Row 4: Repeat Row 2. At the end, ch 1 and then cut the yarn, leaving a long tail.
- Assembly: Fold the rectangular piece in half. Using a yarn needle and the long tail, sew the open edges together with simple stitches. Secure with a knot. The bow’s mid-section is now ready.
2 – Ribbon Portion
- Foundation Chain: Ch 29.
- Row 1: Starting from the 2nd ch from the hook, do 1 hdc in each ch across. (28 hdc). Then ch 1, turn.
- Row 2: Work 1 hdc in each st, blo. Finally ch 1, turn.
- Row 3: Repeat Row 2. At the end, ch 1 and then cut the yarn, leaving a long tail.
- Finishing: Use a needle to weave the tail through the stitches, bringing it to the center of the rectangle.
3 – Assembly of Bow and Ribbon
- Step 1: Squeeze both the bow and ribbon at their center points.
- Step 2: Wrap the long tail from the ribbon around the center of both the bow and ribbon multiple times.
- Step 3: At the back, secure with a knot and weave the excess yarn into the inside of the bow.
4 – Central Crochet Band
- Foundation Chain: Ch 12.
- Row 1: Starting from the 2nd ch from the hook, do 1 sc in each ch across. (11 sc). Then ch 1 and cut the yarn, leaving a long tail.
- Assembly: Wrap the band around the center of the bow to cover the yarn wrapping. Use the long tail to sew the ends of the band together with simple stitches. Finally secure with a knot and hide the excess yarn inside the bow.
AND THE PATTERN IS COMPLETE!!!!
♥️♥️♥️♥️♥️♥️♥️♥️♥️♥️♥️♥️♥️♥️♥️
Tips and Tricks for the Perfect Bow
- Yarn Choice: For a stiff, structured bow, use a cotton or acrylic yarn. If you prefer a softer look, opt for a yarn with a little more drape like bamboo or silk blends.
- Hook Size: Try experimenting with different hook sizes to adjust the tension and size of your bow. A larger hook will create a looser, softer bow, while a smaller hook results in a tighter and more compact bow.
- Customization: Feel free to play around with the number of chains in your foundation row to adjust the size of your bow. You can also add embellishments like buttons or beads for an extra touch of flair.
- Practice Patience: If you’re new to crocheting, take your time and don’t rush. It’s easy to want to speed through the project, but consistent tension and stitch work are key to getting a professional-looking bow.
Suggestions for Use
There are countless ways to use your newly made crochet bow. You may attach it to a headband or hair clip for a cute accessory, sew it onto a bag for a pop of texture, or even make multiple bows in different sizes to decorate a wreath or garland. The possibilities are endless, and because this project is so quick, you can make several in just one afternoon!

Conclusion
As you can see, crocheting a bow is not only easy but also incredibly versatile. With just a few rows of hdc and sc stitches, you can create a beautiful and functional accessory in no time. Whether you’re looking for a quick gift or a fun way to use up your scrap yarn, this bow pattern is the perfect project to add to your repertoire. So grab your yarn and hook, and happy crocheting!
Let your creativity flow and hence don’t be afraid to try different color combinations and sizes. Once you get the hang of it, you’ll find yourself making crochet bows for all sorts of projects. Enjoy the process, and as always, feel free to share your creations with others—it’s amazing what a small piece of yarn can turn into!


| Subscribe … on Youtube | Follow … on Pinterest | Follow … on Instagram | |
