Table Of Contents
Introduction To This Lovely Crochet Blog
Do you love sunflowers and dreamcatchers? In this DIY blog, you’ll learn how to combine both! We’ll walk you through how to crochet a beautiful Crocodile Stitch Sunflower using a free pattern, and then show you how to transform it into a stunning Sunflower Dreamcatcher. It’s a fun and creative project that brings together the rustic charm of sunflowers and the mystical beauty of dreamcatchers.
SHARING IS CARING 🙂
PIN IT TO YOUR FAVORITE BOARD ON PINTEREST

In this blog, I’ll walk you through how to crochet a beautiful sunflower dreamcatcher/wall-hanging, including the materials, stitches, and also step-by-step instructions. So let’s get started!
♥️♥️♥️♥️♥️♥️ Do You Love This Crochet Craft? ♥️♥️♥️♥️♥️♥️♥️♥️♥️
Isn’t this beautiful? Crocheting a sunflower dreamcatcher with intricate crocodile stitch petals is a fun and rewarding project for both beginners and experienced crocheters alike. Whether you’re making one for yourself, gifting it to a loved one, or adding it to your crochet collection, a handmade sunflower dreamcatcher is a stunning and decorative accessory.
In this blog, I’ve provided the written instructions for this beautiful and easy Crochet Sunflower Dreamcatcher. However, you can also visit my YouTube channel by following this link to better understand the stitching techniques, including the detailed crocodile stitch petals, and see the project in action. Happy crocheting!

♥️♥️♥️♥️♥️♥️♥️ Do You Love This Crochet Craft? ♥️♥️♥️♥️♥️♥️♥️♥️
This crochet sunflower dreamcatcher project is a stunning yet beginner-friendly creation, making it ideal for anyone new to crochet. Featuring basic stitches alongside the intricate crocodile stitch for the petals, it offers a balanced challenge that is both easy to follow and enjoyable to work on. As you progress through the pattern, you’ll notice how seamlessly the steps come together, hence ensuring a smooth and rewarding experience. Moreover, this project allows you to practice essential crochet techniques while crafting something beautifully decorative and functional.

If you’re new to working with the crocodile stitch or shaping the intricate sunflower petals, it might feel a little tricky at first. But don’t worry! With some practice, you’ll quickly get the hang of it. This project is a fantastic way to create something stunning while learning new techniques, giving you a fun and satisfying result in no time!
For a step-by-step video tutorial, be sure to check out this YouTube link to guide you through the process!
Please subscribe to my channel for all the latest and the best patterns.
Since, Most of the crochet lovers just loved this pattern….. I think, you will also love it……
Therefore, just leave a comment in the comment section about it.
For getting updates of all my free patterns, please fill in the subscribe form
DECLARATION
Hi, I am Shabari Dutta. I work very hard on each and every pattern provided in this website, So you can always give a credit by mentioning my name & website www.hookedinloopsbyshabari.com in your posts.....♥️♥️♥️♥️♥️♥️♥️♥️♥️♥️♥️♥️♥️♥️♥️, h
You can sell any product made from this patternowever, you may not distribute this pattern as your own in any way!
Let’s get started!
Materials You’ll Need for the Crochet Wallhanging:
- Yarn– I have used 4 ply yarns. However you can use any yarn of your choice.
- Yellow (for sunflower petals)
- Brown (for the sunflower center)
- Green (for the leaves, optional)
- Cream/neutral color (for the dreamcatcher base)
- Crochet Hook: Size 2-3.5 mm or appropriate for your yarn.
- Scissors
- Tapestry Needle
- Metal Hoop (for the dreamcatcher, about 10–12 inches in diameter)
- Feathers, beads, and lace (optional, for dreamcatcher embellishments)
Abbreviations for the Crocodile Stitch Sunflower Dreamcatcher Pattern:
- ch: Chain
- ch sp: Chain space
- sl st: Slip stitch
- sc: Single crochet
- dc: Double crochet
- puff st: Puff stitch
- sk: Skip
- picot: Picot stitch
- sts: Stitches
- yo: Yarn over
- sp: Space
How to Do a Puff Stitch:
- Yarn over (yo): Insert the hook into the stitch or space as indicated by your pattern.
- Pull up a loop: Then draw the yarn through the stitch, keeping the loop loose.
- Repeat yarn overs: Yarn over again and insert the hook into the same stitch or space, pull up another loop. Repeat this step multiple times, typically 3 to 5 times depending on the pattern.
- Yarn over and pull through all loops: After gathering multiple loops, yarn over and then pull through all the loops on your hook.
- Secure the puff stitch: Finally, chain 1 to secure the puff stitch and finish it.
How to Do a Picot Stitch:
- Chain 3 (or the number indicated in the pattern): Start from the current stitch and then chain 3 stitches.
- Insert the hook into the first chain: After creating the 3 chains, insert your hook into the first chain made (this can be either at the base of the chains or into the top of a nearby stitch).
- Slip stitch: Then yarn over and pull through the first chain and the loop on your hook, creating a small decorative loop or “bump” called the picot.
Both stitches add texture and detail, with the puff stitch giving a 3D effect and the picot creating tiny loops for extra decoration.
Crochet Sunflower Wallhanging/Dreamcatcher Pattern
Central disc of the sunflower
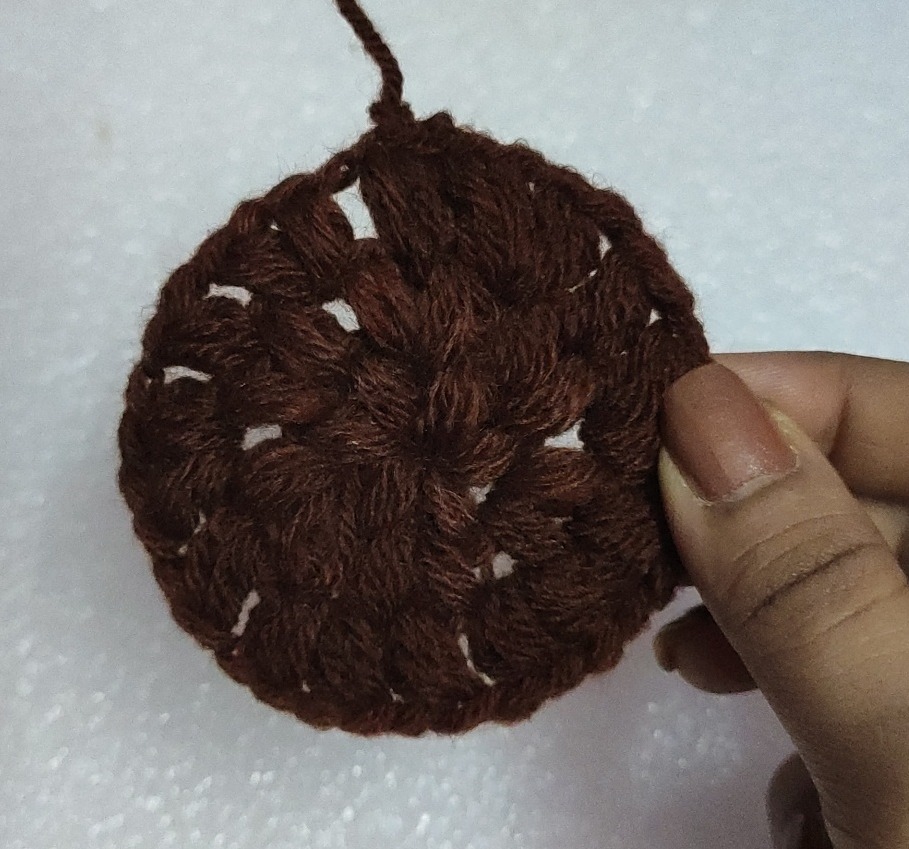
We will take the brown colored yarn and make a magic circle first.
Round 1
We will do 6 (puff sts+ ch1 to secure the puff sts) in the magic circle. Then at the end we will sl st in the 1st puff st, and then in the following ch1 sp followed by a ch1. [6 puff sts]
Round 2
We will pull the loop and do 2 (puff sts+ ch1 to secure the puff sts) in the same ch1 sp. Similarly we will be doing 2 (puff sts+ ch1 to secure the puff sts) in all the remaining 5 ch1 sps of the last round. Then at the end we will sl st in the 1st puff st, and then in the following ch1 sp followed by a ch1. [12 puff sts]
Round 3
We will pull the loop and do 1 (puff sts+ ch1 to secure the puff sts) in the same ch1 sp. In the next ch1 sp, we will be doing 2 (puff sts+ ch1 to secure the puff sts). We will do 1 (puff sts+ ch1 to secure the puff sts) in the following ch1 sp. In the next ch1 sp, we will be doing 2 (puff sts+ ch1 to secure the puff sts). We will repeat this pattern throughout the round. Then at the end we will sl st in the 1st puff st, followed by a ch1 and then cut the yarn. [18 puff sts]
The Central portion is now ready!!


Now we will do the 2 framework layers for the petals
Round 4
Take the orange yarn, make a sl knot and insert the hook in it. We will sl st in any ch1 sp of the last round, do a ch1 to secure the sl st and then we will do 1sc in the same ch1 sp. In the next xh1 sp, we will do 1sc, ch4 picot and 1 more sc in the same sp. (In the next ch1 sp we will do 1sc. In the following ch1 sp, we will do 1sc. ch4 picot and 1 more sc st.)–> repeat till the end of this round.
At the end we will do a sl st in the 1st sc of this round, and we will bring both the loop and the yarn in the front. We will continue with this in the round 6. (refer to the video )

Round 5
Take the yellow yarn, make a sl knot and insert the hook in it. We will sl st in the 1st sc of the last round, do a ch3 (1st dc), then a ch4 picot. In the same st we will do 1 more dc. In the next st we will do 1 dc, sk the ch4 picot of the last round and in the next st, we will do 1 dc. (In the following st we will do 1dc, ch4 picot and 1 more dc.
In the next st we will do 1 dc, sk the ch4 picot of the last round and in the next st, we will do 1 dc.)—> repeat it throughout the round. At the end, sl st in the 3rd ch of the starting ch3 of this round, do not cut the yarn.

Now we will do the 2 layers of the petals
Round 6
We will insert the hook in the orange loop from the 4th round and sl st in the stem of the 1st sc of the 4th round (refer to the video, we will not sl st in the sc st but in the stem of the sc st) do a ch1. We will yarn over and do 4 dc sts inside the ch4 picot of the 4th round.
Then we will do a ch3 picot, followed by 4dc sts in the same ch4 picot sp. (Then we will sl st in the stem of the next sc st (present singly), followed by a ch1. We will yarn over and do 4 dc sts inside the next ch4 picot of the 4th round. Then we will do a ch3 picot, followed by 4dc sts in the same ch4 picot sp.)—> repeat till the end of this round. At the end, we will sl st in the 1st st of the round, ch1 and then cut the yarn. The first layer of petals is complete.

Round 7
We will insert the hook in the yellow loop from the 5th round and sl st in the next 2 dc sts, and then sl st in the following gap(between the 2nd and 3rd dc sts of the round 5) (refer to the video, ) do a ch1.

We will yarn over and do 4 dc sts inside the ch4 picot of the 5th round. Then we will do a ch3 picot, followed by 4dc sts in the same ch4 picot sp. (Then we will sl st in the next gap as marked in the pic above, followed by a ch1. We will yarn over and do 4 dc sts inside the next ch4 picot of the 4th round.
Then we will do a ch3 picot, followed by 4dc sts in the same ch4 picot sp.)—> repeat till the end of this round. At the end, we will sl st in the 1st gap (where we began this round), ch1 and then cut the yarn. The second layer of petals is complete.
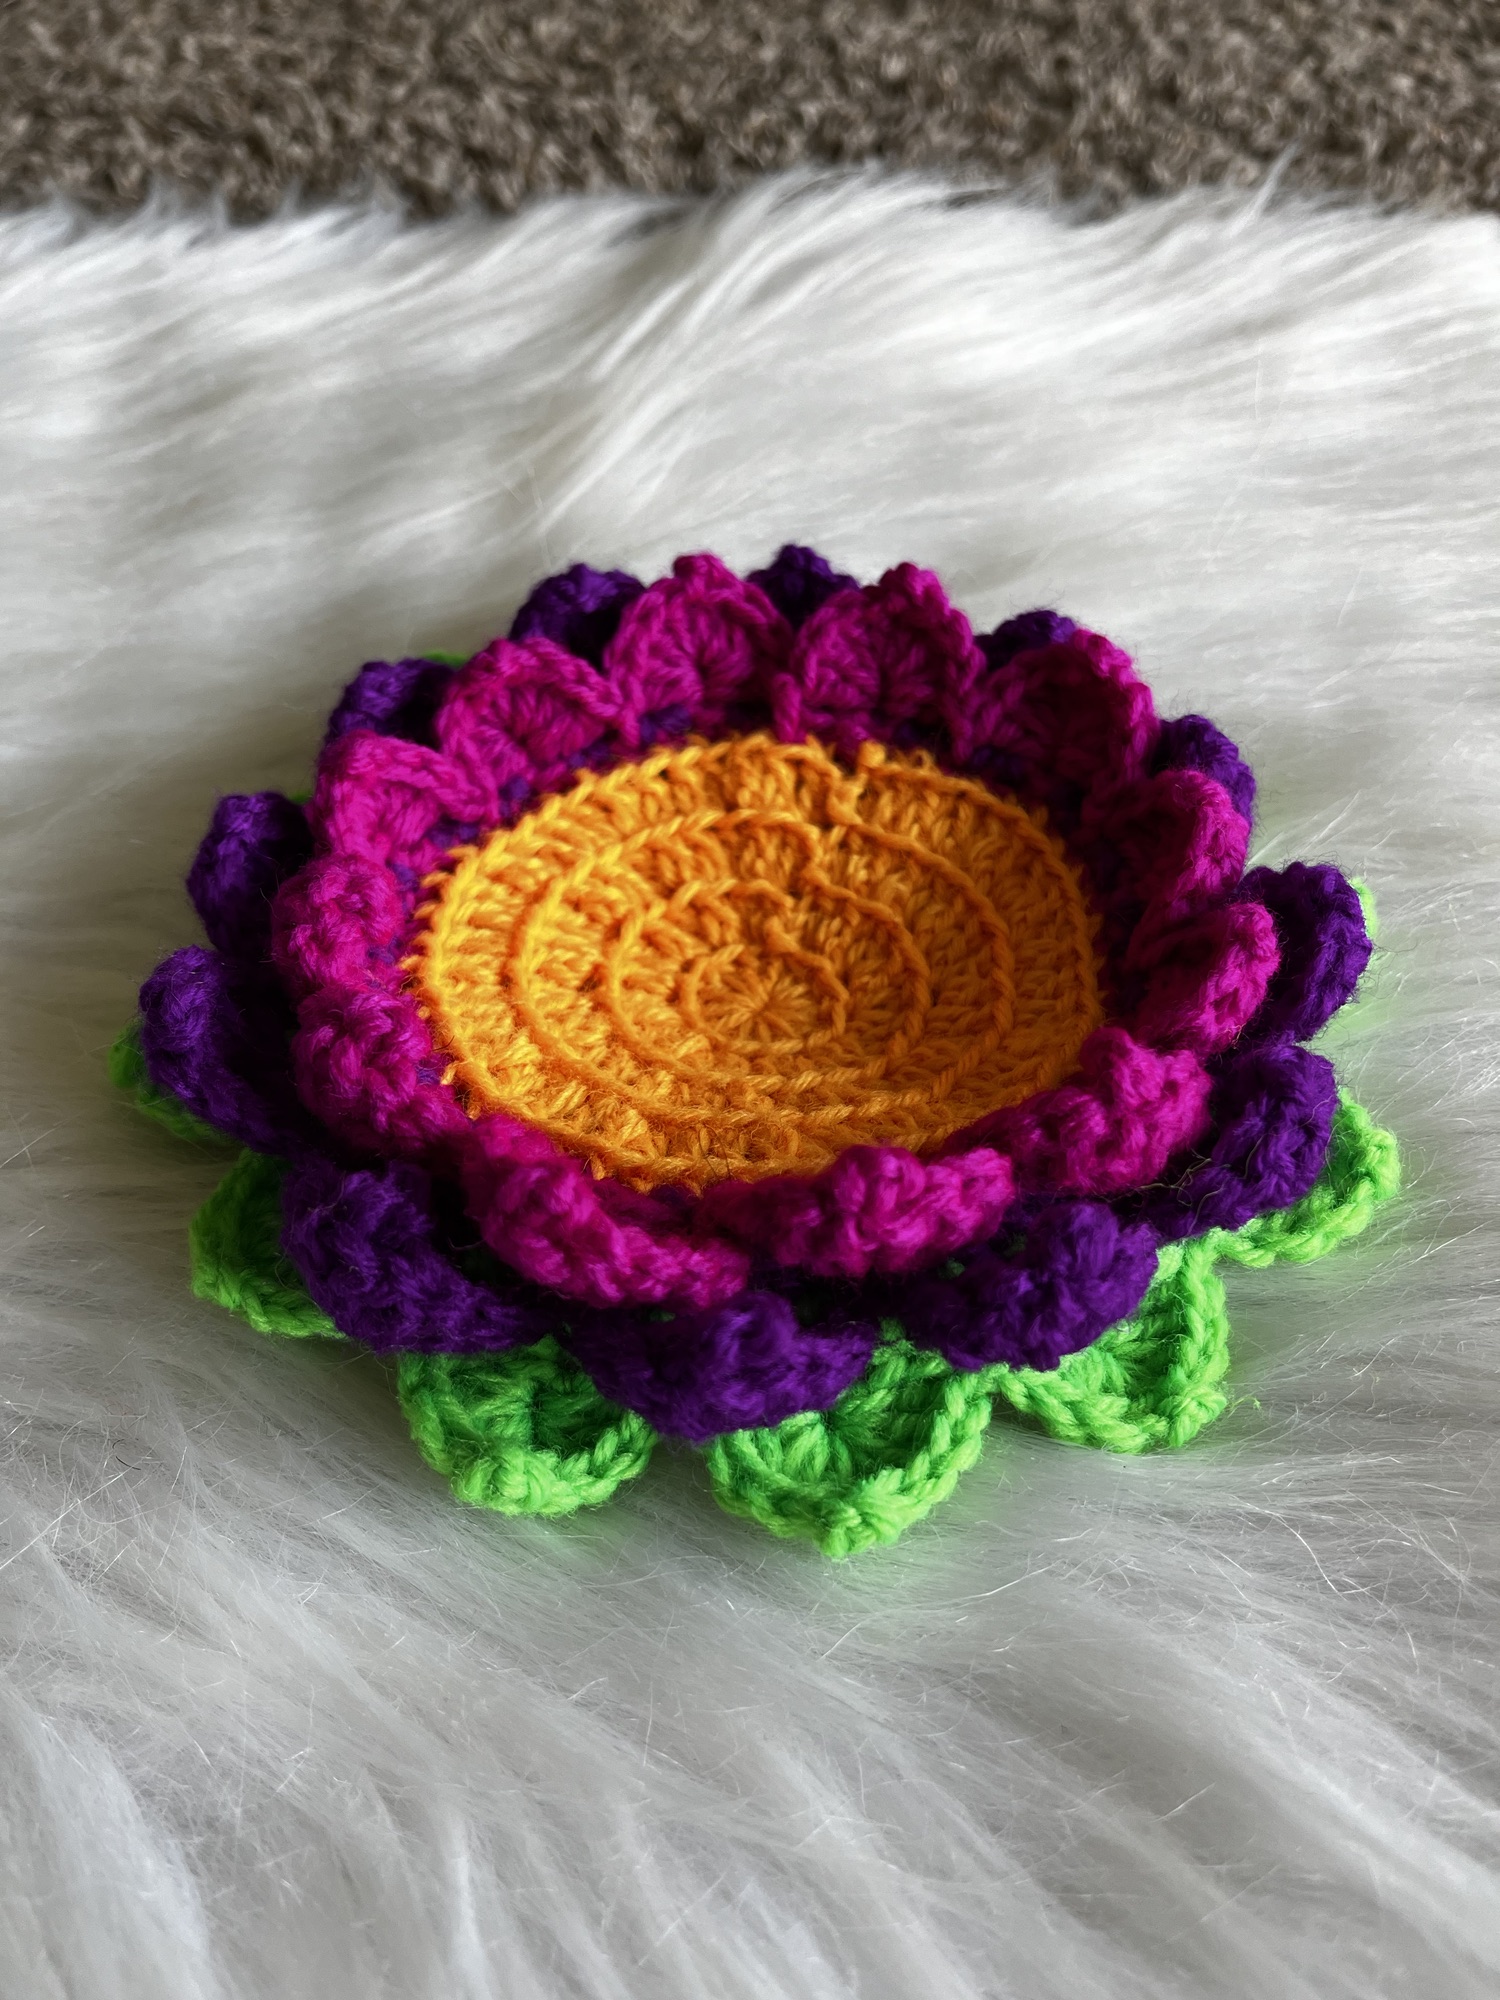
And our SUNFLOWER is completely ready!!!!!! ♥️♥️♥️♥️

You can leave the pattern now and use this sunflower as a coaster or a home decor.
Now we will continue with the dream-catcher pattern!!!

Round 8
We will take the green colored yarn , make a sl knot and insert the hook in it.
We will sl st in any ch3 picot of the round 7, and do ch12. Then we will sl st in the next ch3 picot and again do ch12. After we will sl st in the next ch3 picot and repeat the pattern till the end. At the end we will sl st in the 1st ch3 picot where we began this round, do a ch1 and cut the yarn.
Round 9
We will take the white colored yarn , make a sl knot and insert the hook in it. We will sl st around both the green ch 12 string and the metal ring, followed by a ch1 to secure the sls st. Then we will do 1 sc around the same ch12 string and the metal ring. After that we will do 12 sc sts around the metal ring only.
(Thereafter we will do 1 sc around the next ch12 string and the metal ring together. and then we will do 12 sc sts around the metal ring only.)—> repeat this pattern throughout the round till the end. At the end we will sl st in the 1st sc st of this round, followed by ch40 (for the loop). Then we will sl st in the same 1st sc of the round 9, ch1 and cut the yarn.
Weave in all the loose ends !!!
The SUNFLOWER DREAMCATCHER is now ready!!!!
AND THE PATTERN IS COMPLETE!!!!
♥️♥️♥️♥️♥️♥️♥️♥️♥️♥️♥️♥️♥️♥️♥️

Tips for Customization
- Size Variation: You can adjust the size of the metal hoop or use different yarn weights to make the sunflower and dreamcatcher bigger or smaller.
- Color Options: While we used traditional yellow and brown, feel free to experiment with different sunflower colors for a whimsical or seasonal touch (like burnt orange for fall).
- Personal Touches: Add small beads into your web or attach crystals to the yarn for an extra magical touch.

Final Thoughts
A Crocodile Stitch Sunflower Dreamcatcher is a perfect blend of rustic and bohemian styles, and it’s a fun way to add a handmade, sunny vibe to your space. Whether you hang it in your bedroom for sweet dreams or gift it to a sunflower lover, it’s sure to be a conversation piece.
Have fun crafting, and also feel free to experiment with your designs. Crochet is all about creativity!


| Subscribe … on Youtube | Follow … on Pinterest | Follow … on Instagram | |


